Please read these notes before trying the tour.
- Click here to go back to the plan map -
The Virtual Reality Tour allows you to have a detailed look around the entire area as though you were actually there in person.
The Basics
Controlling the view you see:
You can control the view that you see using the left mouse button and the mouse position. To do this place the mouse cursor anywhere on the VR photograph, Press the left mouse button down and then drag the view point in the direction you want to look by moving the mouse around.
Release the mouse button and the “moving view” will gradually slowdown and stop.
Zoom:
Every VR Photograph offers the ability to Zoom in/Out. This can be achieved using either the mouse wheel (if you have one) or the Shift /Ctrl keys on the keyboard.
Note the keyboard controls do not operate when in fullscreen mode (a limitation of Adobe Flash).
Fullscreen mode
You will notice that at the bottom of the VR Photographs there is a button that you can click called “Fullscreen”. If you click this button it will maximise the view to fill the entire screen of your monitor, this will give you the best possible view.
When in fullscreen mode it will remain in this mode if you use the hotspots on the VR photographs to travel around the mill, If you click the Map Plan button then it will exit fullscreen mode.
To return to the normal view simply click the button again or press the ESC key on your keyboard.
Note that you can not activate fullscreen mode until the VR photograph has fully loaded, this is why the fullscreen button only appears when its ready.
Using the Hotspots to navigate around:
You will notice as you look around that every VR Photograph in this tour have small blue 360 markers on them, these are called Hotspots.
They look like little blue Smarties like this ... ![]()
If you click on one of them with the left mouse button it will transport you to that location as though you had walked there in real life.
Using these hotspots it is possible to wander around the entire area following hotspot after hotspot as good as being there your self.
Using the "Plan Map" to navigate around:
The Mill Plan Map is another way of navigating around.
The plan map shows you an Ariel plan view of the whole Cathedral Green area from above. The locations where VR Photographs are available to view are marked with the same blue 360 markers. To view one of these simply click on a blue marker and it will load in the VR Photograph for that location.
To get back to the plan view map you can use the "Plan Map" button on any VR Photograph. You can use both the plan map as well as the hotspots to navigate around.
The advantage of using the plan map is that you can instantly go to any location without having to travel through VR Photograph after VR Photograph to get somewhere.
Information pop up boxes:
As you move your mouse around you may notice that information boxes pop up like this one...
These are located on certain items only. They will help you learn more about the area. You do NOT need to click on items to make them show up. If information is available then it will show when you move the mouse over it. Some info boxes will state if you can click them for more information.
More Information, if you really want it.
Technical Information:
Please note that to view the VR photographs you must have a broadband internet connection. Please do not attempt to view the VR Photographs using a Dial-up internet connection as they will take several minutes to load and tie up the server needlessly.
This tour uses Adobe Flash Technology to show the VR Photographs on web pages.
Most computers have Adobe Flash installed as standard so you don’t need to install anything, it will just work.
If you are able to watch videos on the Youtube website then this Tour will work also.
In the unlikely event that you do not have Adobe Flash installed then you will be able to install it using the link provided.
Screen Resolution: This tour has been designed around a minimum screen resolution of 1024 x 768 pixels, If you have a higher screen resolution
then the show will auto-fit to fill it. Please use the Full screen option for the best view.
If dragging the VR Photographs seems very sluggish then this means that your PC is not of a high enough specification.
Progressive tile loading:
You will notice that when you first view a VR Photograph, it initially shows the photograph in very low quality black/white. This is gradually updated tile by tile with the high quality image. If you have a poor internet connection then it may take a few moments to fill in the tiles with the proper image. You will see a “load progress” percentage bar that shows how this is going.
Other notes:
1) To get the best performance from this tour it is recommended that you do not have any other programs running while viewing it as they may take valuable resources from allowing it to run at its best.
2) You may notice that once you have viewed a 360 and navigated to another one, if you come back to the one you have previously viewed then it will show instantly rather than taking time to load in. This is because your computer will have cached the image to save time. It will do this to all of the VR photographs as you wander around, this will not happen if you have very little hard disk space left or you have specifically disabled your web cache in your browser settings.
3) Because the VR Photographs were taken on two different days and over a couple of hours you may notice continuity errors when traversing between the outdoor VR’s. Because the cap of the mill can move around depending on wind direction this means that the sails that are mounted on it can be seen in two different positions depending on which photographs were taken on which day.
4) All of the VR Photographs in this tour are 360 x 180 degrees.
Compatibility
This VR Tour has been tested and found to be working on all the popular browsers (at the time of writing, April 2010):
Microsoft Internet Explorer v8.0.6001.18702
Firefox v3.6.3
Opera v10.5
Google Chrome v4.1.249.1064 (45376)
Safari v4.0.5
Maxthon v2.5.1.4751
AOL v9.0 Revision 4156.5067
Some terms to used here:
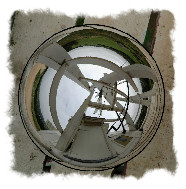
VR Photograph = Virtual Reality Photograph, this is a high resolution 360 degree x 180 degree interactive photograph. Each photograph takes in a full spherical view, in other words you can look all the way round in a circle plus fully up and down as well.
This tour consists of many VR Photographs interconnected via interactive hotspots and also the overall plan map.
Hotspot = This is a special area on a VR Photograph that you can click on and it will transport you to that location. Some VR Photographs have several hotspots, you may need to look up and down to see them depending on your current location.
Mirrorball = Some of the 360 photographs may have a mirrorball on the floor of them which looks like this...
This is just a decorative way of covering up part of the image where the legs of the tripod would be seen. Most of the 360 photographs have had the floor cloned to hide the tripod legs but some have a mirrorball.
This VR Tour was created by Andy Savage of www.derbyphotos.co.uk
Click here to go back to the plan map